Showing posts with label Yuna X. Show all posts

Saturday, August 11, 2012

Final Fantasy X recap

Le Finals :}

So Just In-case you wanted to know what happened with each of these costumes in the final weeks-- this is going to be a wrap up of how I made everything, and how everything finally got done. I will start with X :D Since it was the first game.


I bought the wig from a place called cosplayandwig.com. The wig was extremely easy to style and was nice and thick. However, it seemed like it was styled to a head that was smaller than the size of mine. Some of the cuts didn't line up correctly, so I ended up having to add another layer of wefts at the bottom. I used some bond a weave, to bond the wig fibers to some bias tape, which really didn't work all too well (I really need a wig heat gun thinger). Then I put the wig on my head and sewed the wefts into place.


The earring was made using a combination of glass beads from a Michael's set that i paid $5 for, and some sculpy. I used the sculpy for the abnormally long piece, and the tear drop piece. To make the tassel, i took some of the rope left over from my obi hibiscus and combed it out to become the tassel. I then attached them to an earring because I happen to have three piercings on my right lobe, which ended up hurting a lot by the end of the day.


The white "shirt" was made from just a piece of fabric in a long square with a hem around the whole thing. The jewelry I ended up buying online from Ebay. The sleeves though were also pre-made. <<; I'm a little bit of a cheater. Then, i took a very thin purple rope, because it was all that I could find and braided it to form the sleeves. Painting the beads for all of it was a pain in the butt, as they slipped out of my fingers.


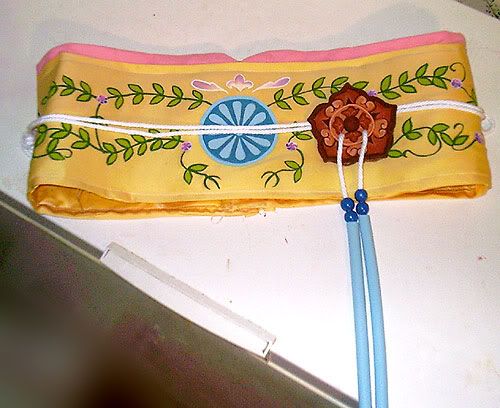
The obi was a little bit harder. We made the the "bow" part as two squares, and then put a little rectangle piece around the middle of them to give the scrunched up appearance. Then the wrap around the middle was jsut that-- a wrap around the middle. For the color fading flowers in the middle, I glued fabric to hard paper, and then glued that onto the fabric. However, i found out soon at otakon that the adhesive that i used to keep the fabric on the glue was not the best ergo some of my pictures are missing my middle flower.

The pattern on the embroidery was hard as fuck, and me and my mother made all of the patterns and then put them into an embroidery machine, and lined them all up perfectly. We did the same thing with the circle in the middle, except around the light blue pie pieces, we had to actually hand embroider (and my mom did it all for me because she's awesome and i have super weak wrists due to carpel tunnel).


I guess this is the best picture i have of the hibiscus in costume. Wow. Sorry, this is shuyin guys out of costume... Um. Yeah, for the hibiscus, i never posted normal pictures of it so i guess i'll post some out of costume.


I dyed the blue cotton rope as I said above, cut out little foam pieces and spray painted them gold, then cut out each individual piece of the hibiscus in foam and made little pillows out of fabric to stick these pieces of foam in. On the back of each of them are little tiny stitches, because I hand stitched it all, and actually made two of them. The triangles were super easy. I just took material and cut it into a small triangle and then folded it on itself to give it the dimension. The fabric i used for the hibiscus were just quilting squares which i got for like 2 bucks each. I picked a dark, medium, and light fabric.


Made the beads out of sculpy, made the tassel the same way as i mentioned above. Painted the beads the same as above. Then I cut the sticks out of some craft dowels, and drilled mini holes in the end just to stick the string in and glued it there to make it look like the string goes all the way through. Just DO NOT use gorilla glue. That is all. Back to the general costume...


Made the skirt, without a pattern. Mom figured it out. I don't know how. Made the flowers in the same cheater way with the embroidery machine. Took regular machine with a tight zig zag stitch around a pattern that we made out of chalk. Put a hem in the skirt after the fact. Forgot to measure the skirt with the cosplay boots, which made it about an inch too short. Shhh. I hate that in some pictures ergo, i don't show them. :D


The staff was made with a resizing program, to make a giant version of the round part that I then traced onto some wood after cutting out with a scalpel. Did the same thing with the dark blue parts, which don't look dark blue in this picture... I spray painted it gold. Painted the rod red and blue with some painters tape, and then wrapped the areas that were gold on the stick with some electrical tape that i had from guard. I then taped that off and spray painted it too-- actually boyfriend did most of that.

The silver part was made with a giant bolt, that was somehow magically cut, and then we used some pieces of pvc to screw onto both the pole and the staff head itself. The round part on top was honestly just the end piece of some pvc pipe, that we cut and spray painted silver. Then we glued it on.

Well. I think that's everything about the costume, other then the fact that elma did a wonderful job with my make-up and making me beautiful.

Here are some spam pictures:


Overall, I'd like to repeat this costume with a crew, so that it gets some more recognition, because I worked really hard on it, and other than a few flaws, I think it was a beautiful costume, and mighty fun to pull off. Um... I think that's it. If you ever have any questions about any of my costumes feel free to message me at Acronymsoup66@hotmail.com, or look me up on facebook (Sugar Blossom Cosplay).

:D Happy Cosplay!

Friday, July 20, 2012

Final Fantasy X Embroidery Story


Thought this was a wicked cool picture. Well, without further adieu, i finally got the time to work on and come nearly close to finishing my X costume. I have no pictures of the staff because it is actually at my fathers work, getting the top silver piece done.

I mean the piece that attaches the gold head, and the blue staff to each other with enough support that the entire staff doesn't fall apart... hopefully that'll be done by Saturday-- considering the convention is-- six days away now @_@. But what you've all been waiting for-- embroidery


As you recall, the skirt previously looked much like this-- just a normal blue pleated skirt--

The flowers looked like this prior to be embroidered, and we used my mother's new brother pe 770 to do so. :D Learn more about this process here.


With Azure's help, we drew out the general pattern with some chalk onto the skirt. Then we took the normal sewing machine, which my mom actually got a new one, and did a really tight zig zag stitch with a thread that had a little bit of shine to it.


The pins are just there to hold the pleats until the day of the convention. Um, uh, it was obnoxious and annoying, and I shed a lot of tears.


Final skirt. :D Only thing that's needed would be a little slit in the side (considering i currently cannot go up stairs). And now to the Obi!


So if you recall, the Obi originally looked like this. Me and my mom made all the embroidery patterns for it, stitch by stitch, in a program called buzzedit. This program is not for the weak of heart.


It's a very odd program, and involved a lot of copy and pasting from previous designs. After we finally got the design finished and looking close to the anime, we had to size it.


Glued thick paper to the back with temporary adhesive to give the embroidery the ability to stand on it's own.


We printed them out, life size, and then adjusted and changed them as needed; which was probably the hardest-- awkwardest-- thing that i've ever done for cosplay. Ha. And then the embroidery started. (If you ever need any of these patterns for an embroidery machine and you have no idea what you're doing, feel free to email me at acroymsoup66@hotmail.com and i'll give them to you!)


The image that I showed you, in PE design is the embroidery going down the center of the obi here.


The obi's pattern in full. I couldn't get the whole pattern because I happen to be skinnier then yuna, but i used the following picture as a template and tried to get it all correct in the front, and then-- look better for my shape in the back considering most of it is covered by the bow.


It's then got velcro on the back to keep it together, cause i make a poser obi instead of a real one :D


Left to do for this is to embroider the dark blue by hand in the middle of the circle, because the machine couldn't do it. It ended up getting all caught up in the machine and almost completely broke it, so i don't recommend doing this. And I have to figure out a way to do the flower above the circle-- which i also have no idea how to do.

Anyways. Happy Cosplay! :D More very soon!

More pictures:


Next up! Hibiscuses for the masses.

Thursday, June 14, 2012

Skirt flowers down :D


Okayyy. Back to Final Fantasy ten now that i've-- made Gippal's Cloak, made Rikku's skirt, helped paine with her shawl thing (is that what that should be called?), headbands, um-- and everything else that doesn't make much sense when it comes to final fantasy ten. Mainly cause we're in an alternative reality right now-- nerd joke-- get it?


Momma got this embroidery machine for her birthday and it's seemed like a god blessing when it comes to this costume. Haven't seen anyone else do their flowers with an actual embroidery machine yet! It's a brother p770, and takes a lot of weird files and loads of fun complicated things.


This is the pattern that we bought from an embroidery website (here.) We (mainly Niki actually), removed the leaves, re-colored the flower itself, and removed the happy holidays (Because the flower was supposed to be a Pointsetta-- though most Pointsetta's don't look like this). Wow that's a lot of parenthesis in a paragraph.


The flowers had to then be uploaded via a usb, and then put into the machine itself. We made three different sizes... Which i thought I had a picture of i guess i don't. There were three different sizes, and then I placed all the little flowers and pinned them to the skirt where I wanted mom to put them. She then embroidered the entire skirt for me :D


Here are all the flowers done. Now i'm working on getting my main artist over here to draw the scribbles on the skirt, which we'll do on a normal sewing machine, as per mom. Uhhh. I guess that's it? Sorry I don't have more pictures. Happy Cosplay! :D

I'll probably have a giant post soon about all the other costumes and their progress as per nobody uploads their blogs, though they are all authors on here-- <<;;;. Back to sewing!

Tuesday, May 22, 2012

A little less, but more than it was :D Yuna from X


Well, as promised. Here's the update on final fantasy X :D Whilst I am watching DBZ. Forgive me, because it is 5am here, and I am very sleepy, and however unenthusiastic i may sound, i promise that that is just my exhaustion :D


The Bow

Mom just about killed me for the perfectionism that revolved this bow. It was made 3 times? Maybe four. The first time it was too pointy, the second time it was too floppy, the third time i don't really remember, but this is the fourth attempt.

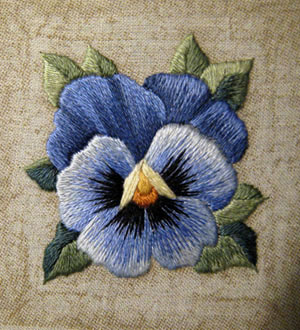
Granted, this bow isn't actually perfected nor sewed together, because it's still awaiting embroidery. However, until then this bow will remain pinned together. Speaking of embroidery, i was thinking of using a pansy as the flower part inspiration


Something like this possibly? Less detailed and obviously smaller. For the leaves however, we're probably going to do most of it by hand. Placing the flowers with the embroidery sewing machine, and then connecting them with green thread with the normal sewing machine. I hope that makes sense. This is one example of an already embroidered obi, and i hope to turn mine into something like this one. No idea how to do the hibachi flower, or the circular pie pieces in the middle, or the faded petals... However, We'll try our hardest! And I think that it should work.

The Skirt


As you can see, the skirt's pleats have been ironed in. We're (me and mommy) having a hard time keeping them there. But we're going to wait till we get the embroidery into the skirt before we try drastically to force the suckers to stay in. 

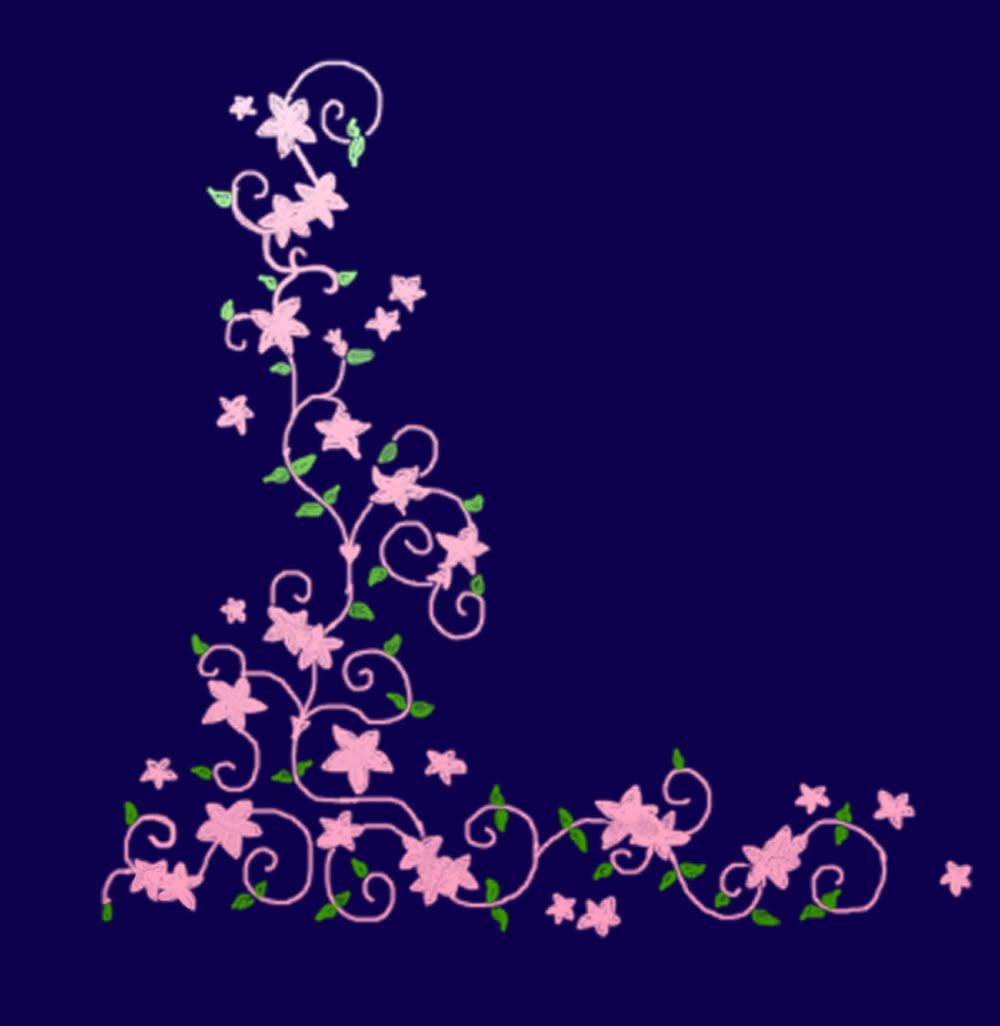
Thinking of a couple different flowers for the embroidery on the skirt. Here is an example of what the flowers look like. As you can see, they're kind of stars. Thinking of using something like these, they're called Bauhinia. I'm also thinking of maybe using pointy Cherry blossoms.

I guess we'll see what happens, either way, i know it'll turn out amazing, especially considering these little details are going into it <3 I think this is one of the things I love the most about cosplay.

Things I have left to do:
Hibachi flower
Staff + Staff head (If you have a lazer saw, totally hit me up for a commish)
Fixing minor details on the sleeves that aren't really pictured here (ribbon, beads)
Embroidery obviously
Trying to get the pleats to stay
Um, uh, everything else :D

Until the finish, I'll keep ya'll posted. :D Happy Cosplay! 

Tuesday, May 1, 2012

Wigs for one, and wigs for all!

Today, I tried on like seventeen wigs seemingly. (actually it was only three and you'll see them all below. We got our Yuna X-2, Yuna X, Paine, and Rikku wig from a website called cosplayandwigs.com which i really recommend for group cosplayers because they gave my group a discount <3.

First-- we did our hair. I find that the easiest way to do under wig hair for long hair is to do two french braids, and plan on teaching all the cosplayers similarly.


So, let's start off with Yuna (because that's me!!!)


Two wigs, $30 each from that cosplay and wig shop that I mentioned previously! :D The one on the left is Yuna from X,  and the one on the right is Yuna from X-2, which I will be using for the group shots.


So Yuna A, and Yuna B. The one on the left almost feels natural on my head while the right does not. :{ It's not so unbelievely tight that it hurts obnoxiously though, last year i wore the giant hoops on my head which I think hurt more than any short brown wig can. Also in the picture on the right, you can see my hair line. Considering I have brown hair, this isn't the largest deal, but i can see it, which annoys me.


So, naturally me and Paine posed a little bit. I was thinking of maybe using some sort of temporary hair lightener on my hair line so that it does look more natural. I don't know though. Everyone else doesn't thinks it's a big deal.


Niki right here, is showing the admiration of her beautiful wig. So on to paine! This is her, just styling it mostly with her fingers to get the wig to perk up in the manner that it needed to. She'll be doing more styling, and posting her own posts describing this styling. So stay tuned! :D


Rapunzel, Rapunzel, let down your long hair.

Oh wait, you're not Rapunzel! Dx Paine, gtfo. Because Rikku hasn't been able to get over to try on her wig, I did it for her to make sure that nothing was abnormal, etc, and to figure out how to properly connect this little pig tail that paine is sporting oh so beautifully.


The wig company that we bought the wigs from connected the hair for the excess pony tail to this giant clip thing. And at first, this made me scared cause I had no idea how I was going to connect this to Rikku's wig. (which is a normal short blonde thing).


The wig itself is also really thick, just like all the rest, which made the pony tail surprisingly easy to attach. we used the braids, and a little bit of the pony tail to cover up the clip.


Shuyin's wig is complicated. Matt wants it to look like this, but it doesn't at the moment. So his wig is going under construction, with beautiful artist Niki at his side. He will also post progress later. (I hope).


So here are the three wigs. We really need to get better at posing with each other <<;

Happy Cosplay! :D